This “Music Notation Parts Cards and Cutouts” is the second of three rhythm resources I’m releasing this month.
The first was rhythm trees in duple in triple meters. The final one will be a huge set of rhythm cards for building rhythm patterns.
I’ve been using all three resources in various forms in my studio for several years and am finally ready to share them with you!
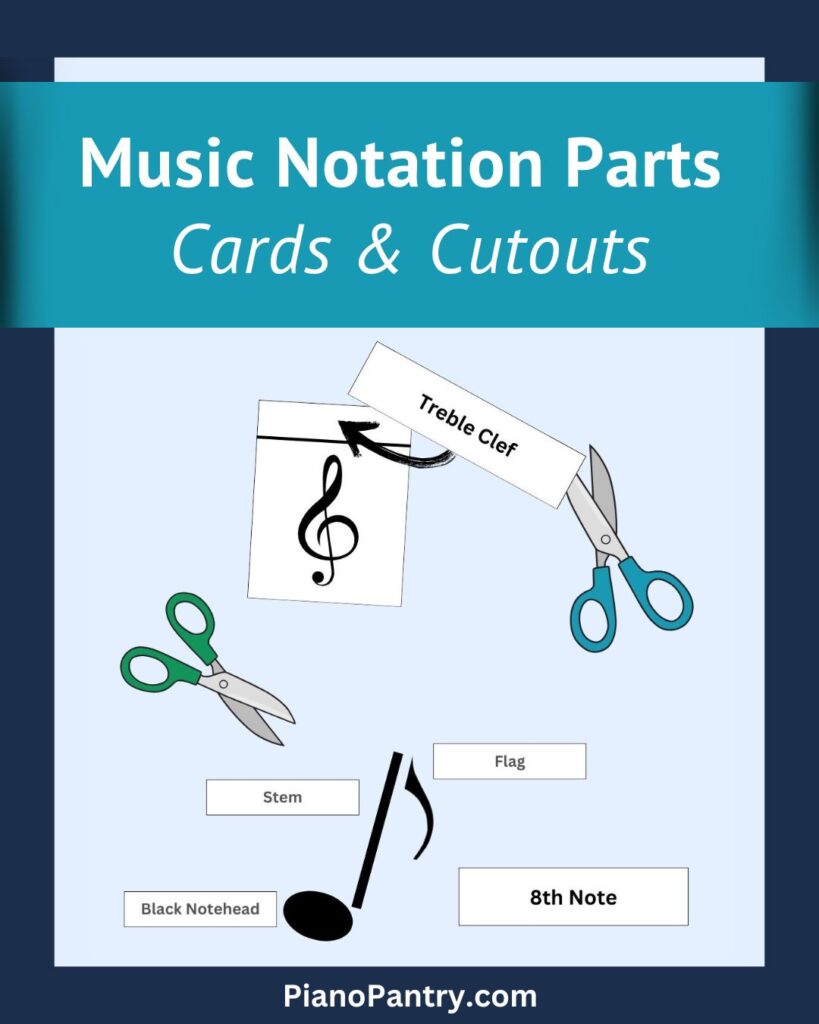
This 11-page Music Notation Parts resource contains three types of notation-recognition activities.
- Identifying note parts and pieces
- Assembling “puzzle” pieces to form every type of note
- Matching two-piece cards that pair note names and staff parts with their symbols
I’ll share plenty of photos and details to give you a clear picture of how you can use this with your students First, let’s talk about why I created this resource.
Why I Wanted This Resource in My Studio

While there are a plenty of worksheets, games, and activities available to reinforce music notation concepts, I’ve always wanted something that captures the “big picture.”
At its core, music notation can be broken down into 8 fundamental note parts that, through various combinations, form any note: black notehead, white notehead, dot, stem, beam, double beam, flag, and double flag. Additionally, there are 5 foundational rhythm “names” – whole, half, quarter, eighth, and sixteenth – that apply across different notational styles.
These 5 rhythm names aren’t limited to just one appearance; they apply to a range of “looks,” whether as notes, rests, dotted notes, or different beam groupings. For example, the term “eighth” applies to multiple variations:
- A single note with a flag
- A single note with a flag and a dot
- An eighth rest
- Two, three, or four notes beamed together
That’s at least six different variations—and let’s be real, there are even more! While this system may not cover every variation, it gets pretty close.
Just because they may not be encountering all of the notes in their current repertoire doesn’t mean they can’t have an awareness of other notes they may encounter in the future.

You may have noticed in the above photo I did not include dotted whole notes. While I did include it in the rhythm tree resource, I chose not to include it here because it is not a rhythm that students will hardly (if ever) encounter. It is likely they may inquire after observing it as “missing” when the cards are laid out in this format at which point you can confirm that yes, it is possible, but not typical.
You might also be thinking, “But what about 32nd notes?” OK, OK—yes, they exist! But again,
- The majority of students may never actually encounter a 32nd note.
- It’s often unnecessary to explicitly teach them—most students figure it out on their own.
This is exactly why I love presenting everything as a whole—so students can see the big picture. When you introduce the rhythmic values of half, quarter, eighth, and sixteenth notes (2-4-8-16), most students have an ‘aha!’ moment and instinctively ask, “Wait, is there a 32nd or 64th note?” Ding, ding, ding!
Again, it’s about the big picture.
Another reason I created this resource? Sometimes, I don’t want a fancy game—I just need a simple, effective tool to give my students a clear visual.
Taking Inspiration
This resource was inspired by others and I want to give credit where it’s due.
The first time I heard about breaking down notation into its parts was from the late Marilyn Lowe, author of Music Moves for Piano. Drawing note parts is one of the first steps in her Reading and Writing books.
Many teachers in the Music Learning Theory (MLT) Community have had a voice sharing ideas and resources on the idea of “emergent music literacy” including Sarah Boyd, Celeste Watson, Scarlette Kerr to name a few.
This concept involves exposing students to printed notation, gaining awareness that it has meaning, and interacting with it at an exploratory level before formal reading instruction begins. (And, as Sarah helpfully clarifies, emergent music literacy is not the same as “pre-reading.”)
Another source of inspiration was the note transparencies found in the TCW Resources Kreative Keyboard Kit sold by Kjos, as you see in this photo.

Let’s get to the nitty-gritty of what’s included in this resource!
Note Parts Cutouts
Again, this printable includes three main sections. The first section includes cutouts of the individual “parts” needed to construct any note.
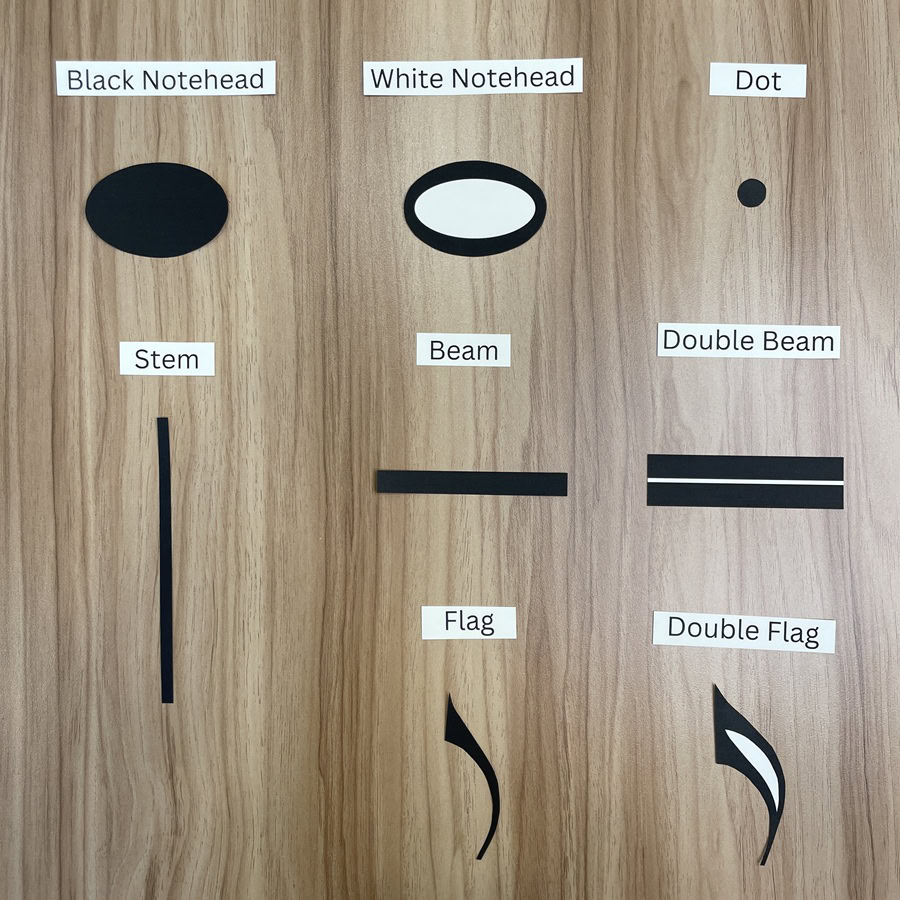
For the record, I highly recommend laminating everything with the heaviest lamination your laminator can handle (I think I used 5-7 mil?).
For these photos, though, I kept the pieces unlaminated to avoid glare. You’ll see the laminated versions at the end!
If you’re someone who cringes at the thought of cutting out all the intricate pieces, no worries—I’ve created a set of card-matches for the same note parts. Take your pick, or use them for two students at once!

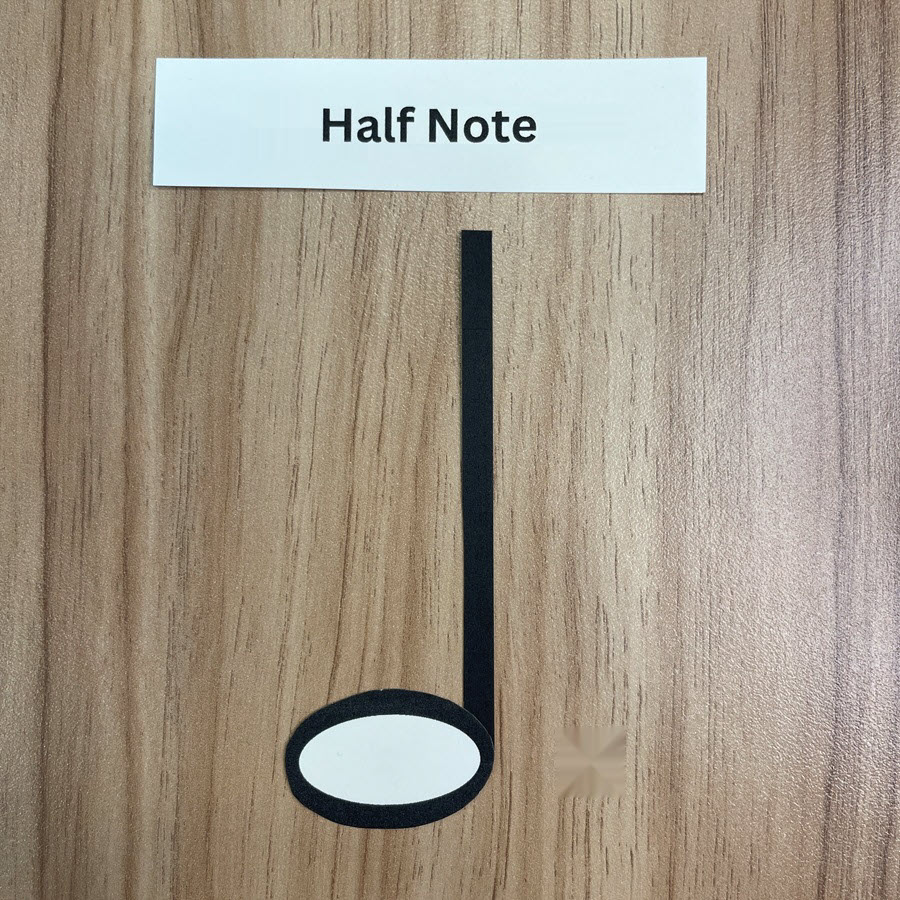
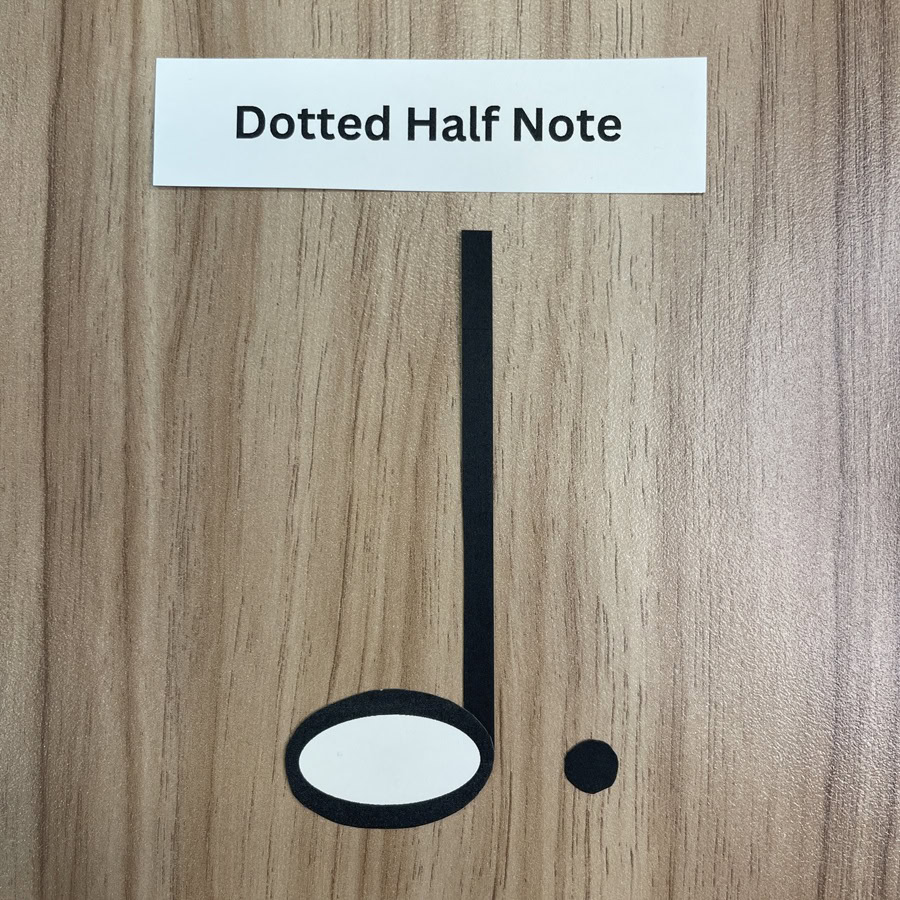
Puzzle Piece Assembly
The second part of the resource includes “puzzle” pieces for assembling every type of note (just not all at once!). I don’t know about you, but I wasn’t about to cut out that many stems and noteheads—ha!
For reference, the beams are twice as thick as the stems, and this set is slightly smaller in scale than the note parts cutouts.
Here are all the combinations you can create with these puzzle pieces.


Name-Matching Cards
The third section of this resource are the name-matching cards both for rhythms, and for the music staff.

Ways to Use this Resource
If you’re introducing these concepts to students for the first time or working with a student who struggles to focus or does better with less stimuli at once, I recommend revealing and adding one line at a time. This step-by-step approach makes it easier for students to recognize the note-name pattern as they emerge.
You can either make the name cards visible as you see here or sometimes I hold them in my hand and ask students to name it on their own then I hand then the name card.

To make it more challenging, mix up the pieces instead of keeping them in the perfect order shown in the original photo!
Another way to do this would be to ask the student to line up the cards in order
You can also turn it into a simple memory game, but instead of matching by note value, match by name. For example, anything with the word “sixteenth” in it could be paired together—like a sixteenth note with a flag, a sixteenth rest, or a beamed pair of sixteenth notes matched with a dotted sixteenth with a flag.
To ensure the game works smoothly, I recommend removing the dotted quarter and dotted half notes so that every note has a matching pair.


Protect Your Cutouts
You know how quickly things like this can get destroyed after just one use! And let’s be honest—none of us love cutting everything out twice. So, do yourself a favor and take the time to laminate these! You’ll thank yourself later.

Even the matching cards will hold up better when laminated – especially since the name cards are only one inch wide. Without lamination, they’ll get bent in no time…and you know exactly what I mean!


By the way, this Apache Laminator has been a workhorse for me for more than 10 years. I highly recommended it!

How to Purchase
This product is available in the Piano Pantry Shop or you can add directly to your cart here.